TECHAV.com
home automation - home theater - pc integration
IES Insteon Touchscreen
Posted 11/04/2007
Please note that this is a review of a beta product, I'm sure things will change before release. This is not a full review - I don't think one would be fair, since the product is still in beta. I will, however, provide whatever info I can.
This touchscreen is being developed by IES. IES is a company who has been in the touchscreen business for a while, with some big-name customers (HAI, Russound, DSC, etc.). From what I understand, this will be their first product marketed under their own name. As far as I know this is their first product in the Insteon market, and they seem excited about it.
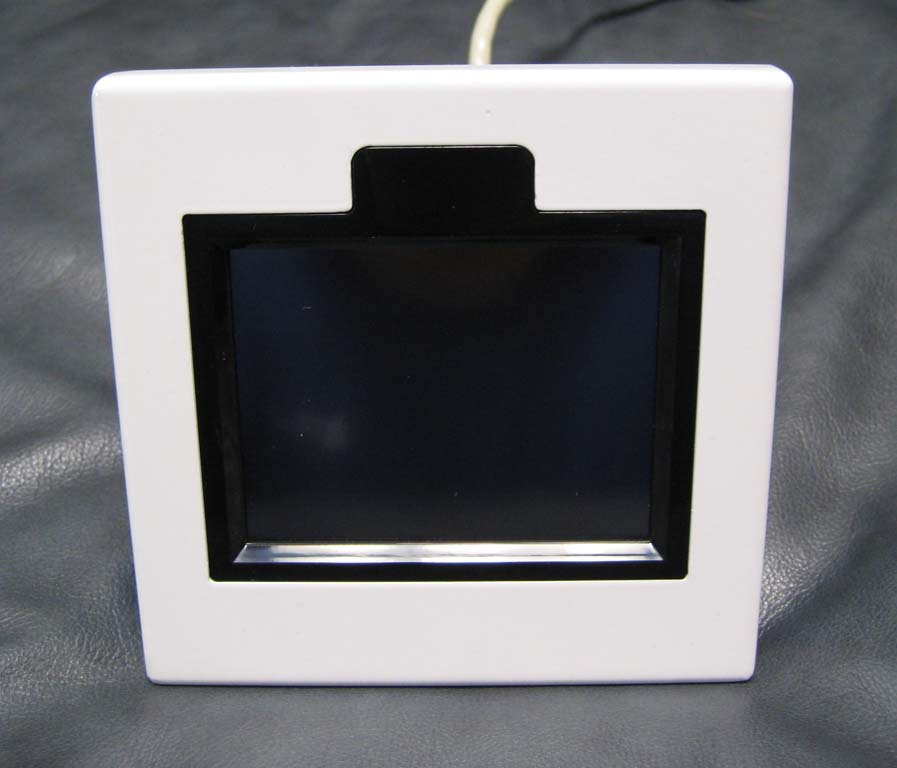
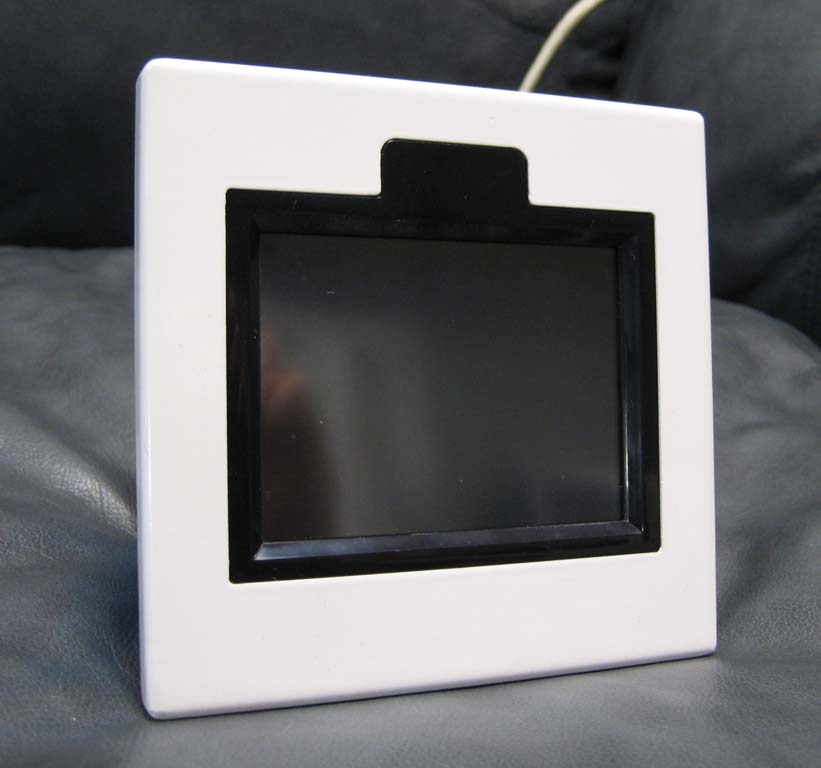
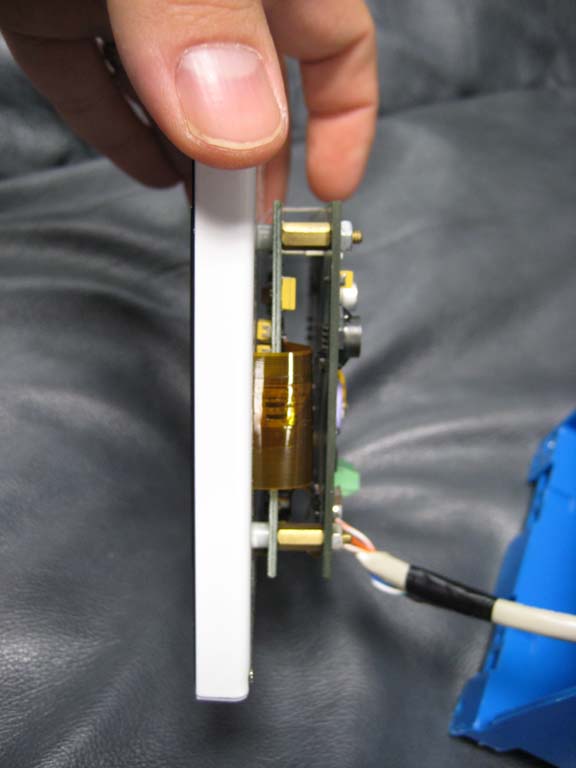
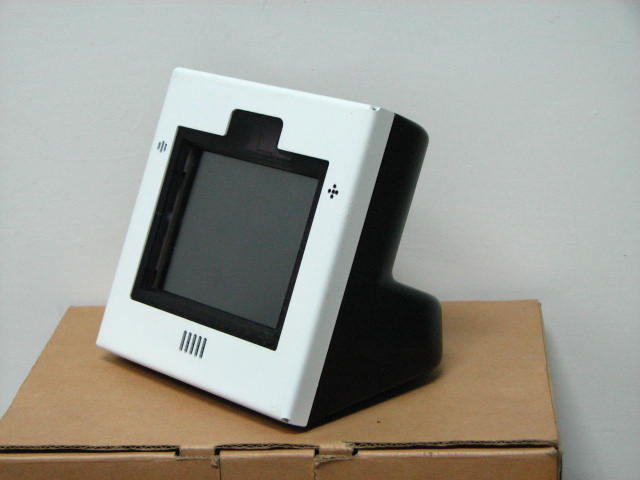
Basically, it's a 3.75" touchscreen available in a 2-gang wallmount form factor. I'm told they also plan to offer a tabletop enclosure for it. The unit communicates to the Insteon network through a PLM. The only cabling required to the touchscreen is a single Cat5, which plugs directly into a PLM somewhere on your powerline. Power is supplied through the PLM.
Software is supplied with the unit that installs on a Windows-based PC. You attach the touchscreen to your PC via a USB cable. The software is fairly straightforward, and divided into 3 main sections:
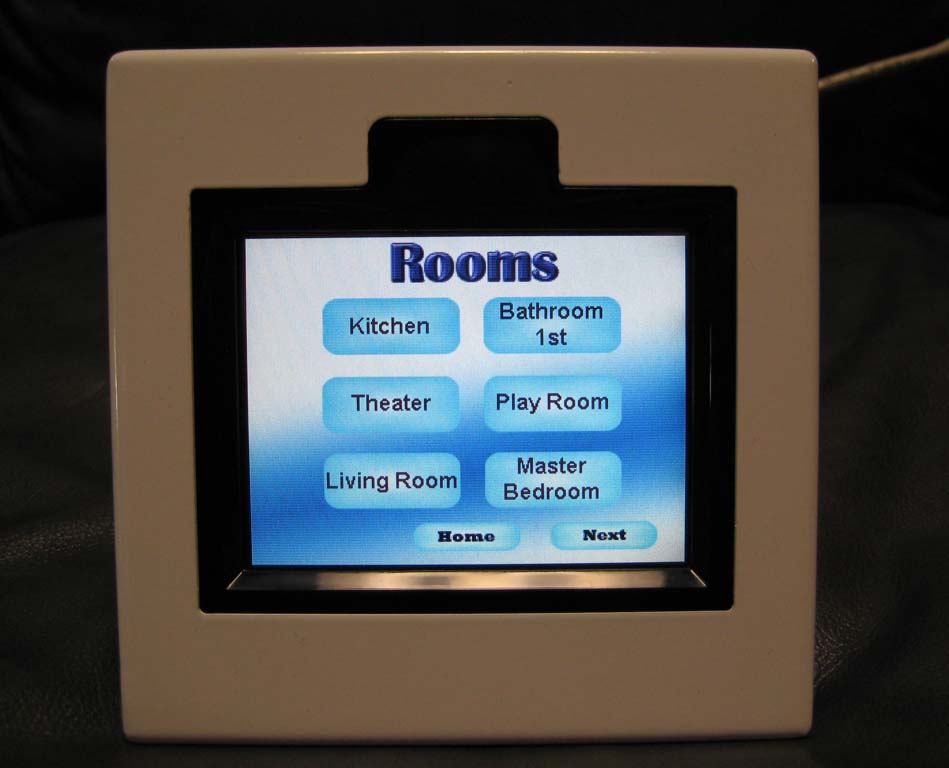
1 - MODULES - this is where you create ROOMS, and MODULES within that room. For example, you could create a KITCHEN room, and a TABLE module within that room, plus SINK, BREAKFAST BAR, RECESSED, etc. modules. Then you could create a BATHROOM room, then a VENT module, MIRROR LIGHT module, etc. I added some test lights to the configuration by specifying the Insteon address.
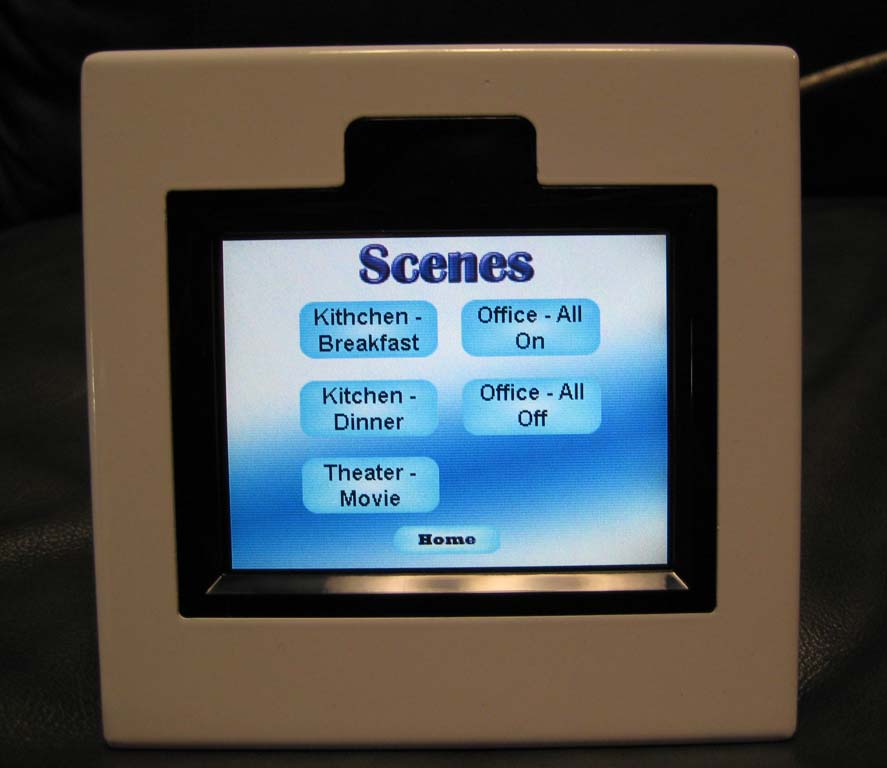
2 - SCENES - this is where you create SCENES that you you'd like the touchscreen to offer. For example, you could create a DINNER TIME scene for the kitchen that sets the SINK, BREAKFAST BAR, and RECESSED lights to 0 or off, and then set the table lights to 70% brightness. You simply drag and drop your pre-defined modules into your newly created scene, and assign the desired levels.
3 - SCHEDULES - this is where you definite a schedule you'd like to run. Daily, specific days of the week, a one-time date, weekends, weekdays, etc. You add a module you'd like to include in that schedule, you define a time, and you define what you'd like that module to do (on/off/level).
Once you create your configuration, you can save it out to a file, and/or download it to your touchscreen via a USB cable. Downloading to the touchscreen is extremely quick and easy.
On the touchscreen itself, the home screen shows you the current date and time, and also tells you whether or not you have any schedules set to run. You're also presented with 3 main functions:
1 - SCENES - here you simply select a scene you would like to activate.
2 - MANUAL - here you can choose a room that you'd like to control. Within that room you'll see a series of buttons that represent the modules you have defined (TABLE, SINK, BREAKFAST BAR, etc.). You can also see the current status of each module (on, off, or current level). If you press the screen to select a module, it will bring up controls to turn that module ON, OFF, 25%, 50%, or arrows to dim up or down. If it's a relay, it will not show you any dim-related controls.
3 - SCHEDULES - here you can see any schedules you have defined, and simply press them to toggle them on or off. You can also see a list of upcoming schedules set to run.
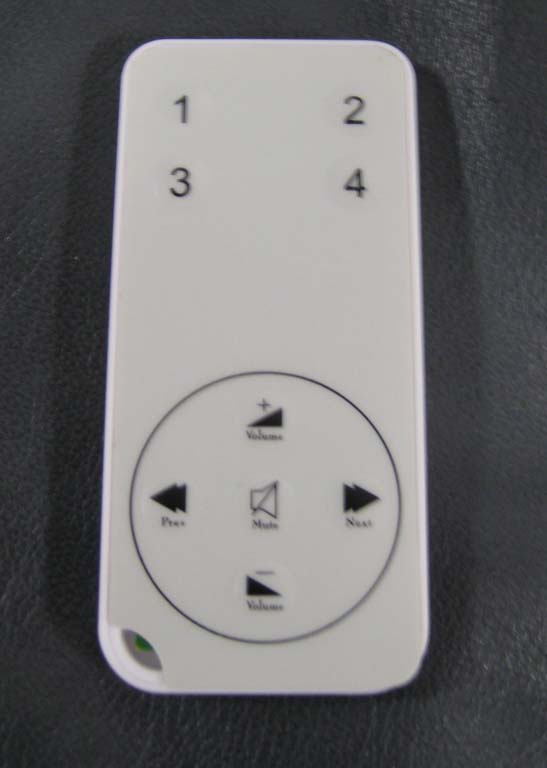
The touchscreen also has an IR receiver to allow remote control of certain functions in the touchscreen. The beta unit I tested included a tiny slimline remote that allowed you to activate scenes configured on the touchscreen.
The touchscreen itself is nice and bright, and is very responsive to the touch. No sharp or hard touch is needed - a simple soft touch from your fingertip is all that is required. The form factor is nice, and options for in-wall and tabletop will make it flexible. The single Cat5 requirement makes it easy to install. The screen itself is very slim - approximately 1.5" deep, as shown in the photo. Only 4 wires are utilized in the Cat5 cable.
If you hook the PLM direct to your PC via a serial port, the software allows you to test your modules, scenes, and schedules. You can also discover switches without typing in the address - simply create the module in the software, set it to discover, then go tap the device.
The software also includes a nice "report" option that will print a list of your devices, the scenes you have created and what they contain, etc.
One limitation of the current software is that it does not utilize Insteon groups - switches are controlled individually through the touchscreen both manually or through scenes. I'm told they are currently working on adding group support.
This product definitely fills a hole in the Insteon product line - a nice touchscreen interface that's easy to setup and use. The built-in scheduler is also a nice feature.
All in all, the touchscreen has been working very well here. From what I've been told, expect the price to be $450 to $500 - not including the PLM.
Links
Interactive Electronic Systems
IES Easytouch-S